Newsletter Settings

Learn how to make the Klaviyo or Mailchimp Newsletter App works.
Written by Jonathan Diaz
Updated 1 month ago

Newsletter Type – Select your ESP (Email Service Provider) here. Mailchimp or Klaviyo are available to connect to.

13 STEPS

1 The first step is to open the theme settings area of your Shopify theme config and go into the Newsletter Settings section.

Step 1 image

2 FIrst, select your autoresponder.

1. None (Default shopify)
2. MailChimp
3. Klaviyo

Step 2 image

3 If using MailChimp, the first thing you need to do is enter your List URl 

Step 3 image

4 Next enter the MailChimp U ID.

Step 4 image

5 Next enter MailChimp ID.

Step 5 image

6 Next, If you selected the Newsletter type Klaviyo than enter your klaviyo id.

Step 6 image

7 Now enter your Newsletter Heading Text.

Ex. "Stay In The Loop".

Step 7 image

8 Now scroll down and input your Newsletter Text.

Ex.
"Become a [yourstorename] Insider and get 10% off your order today. Plus we'll keep you up-to-date with the latest theme news."

Step 8 image

9 Next type your newsletter success message.

It will show when customer submits a valid email address.

Step 9 image

10 Next type a coupon code if you would like to hand out a coupon when the customer opt's in. 

Step 10 image

11 Next enter your Newsletter button text.

Ex. "Sign Up".

Step 11 image

12 Now save your theme config.

Step 12 image

13 That's it. You are done!

Step 13 image

Here's an interactive tutorial for the visual learners

https://www.iorad.com/player/1595223/DemoStore---Newsletter-Settings

How to obtain your MailChimp list Url, MailChimp UID and Mailchimp ID

Navigate to https://us2.admin.mailchimp.com/lists/ or the page inside MailChimp that displays your lists, select your list and then select 'embedded forms', copy the details outlined in the following screenshot to the fields in the theme config.


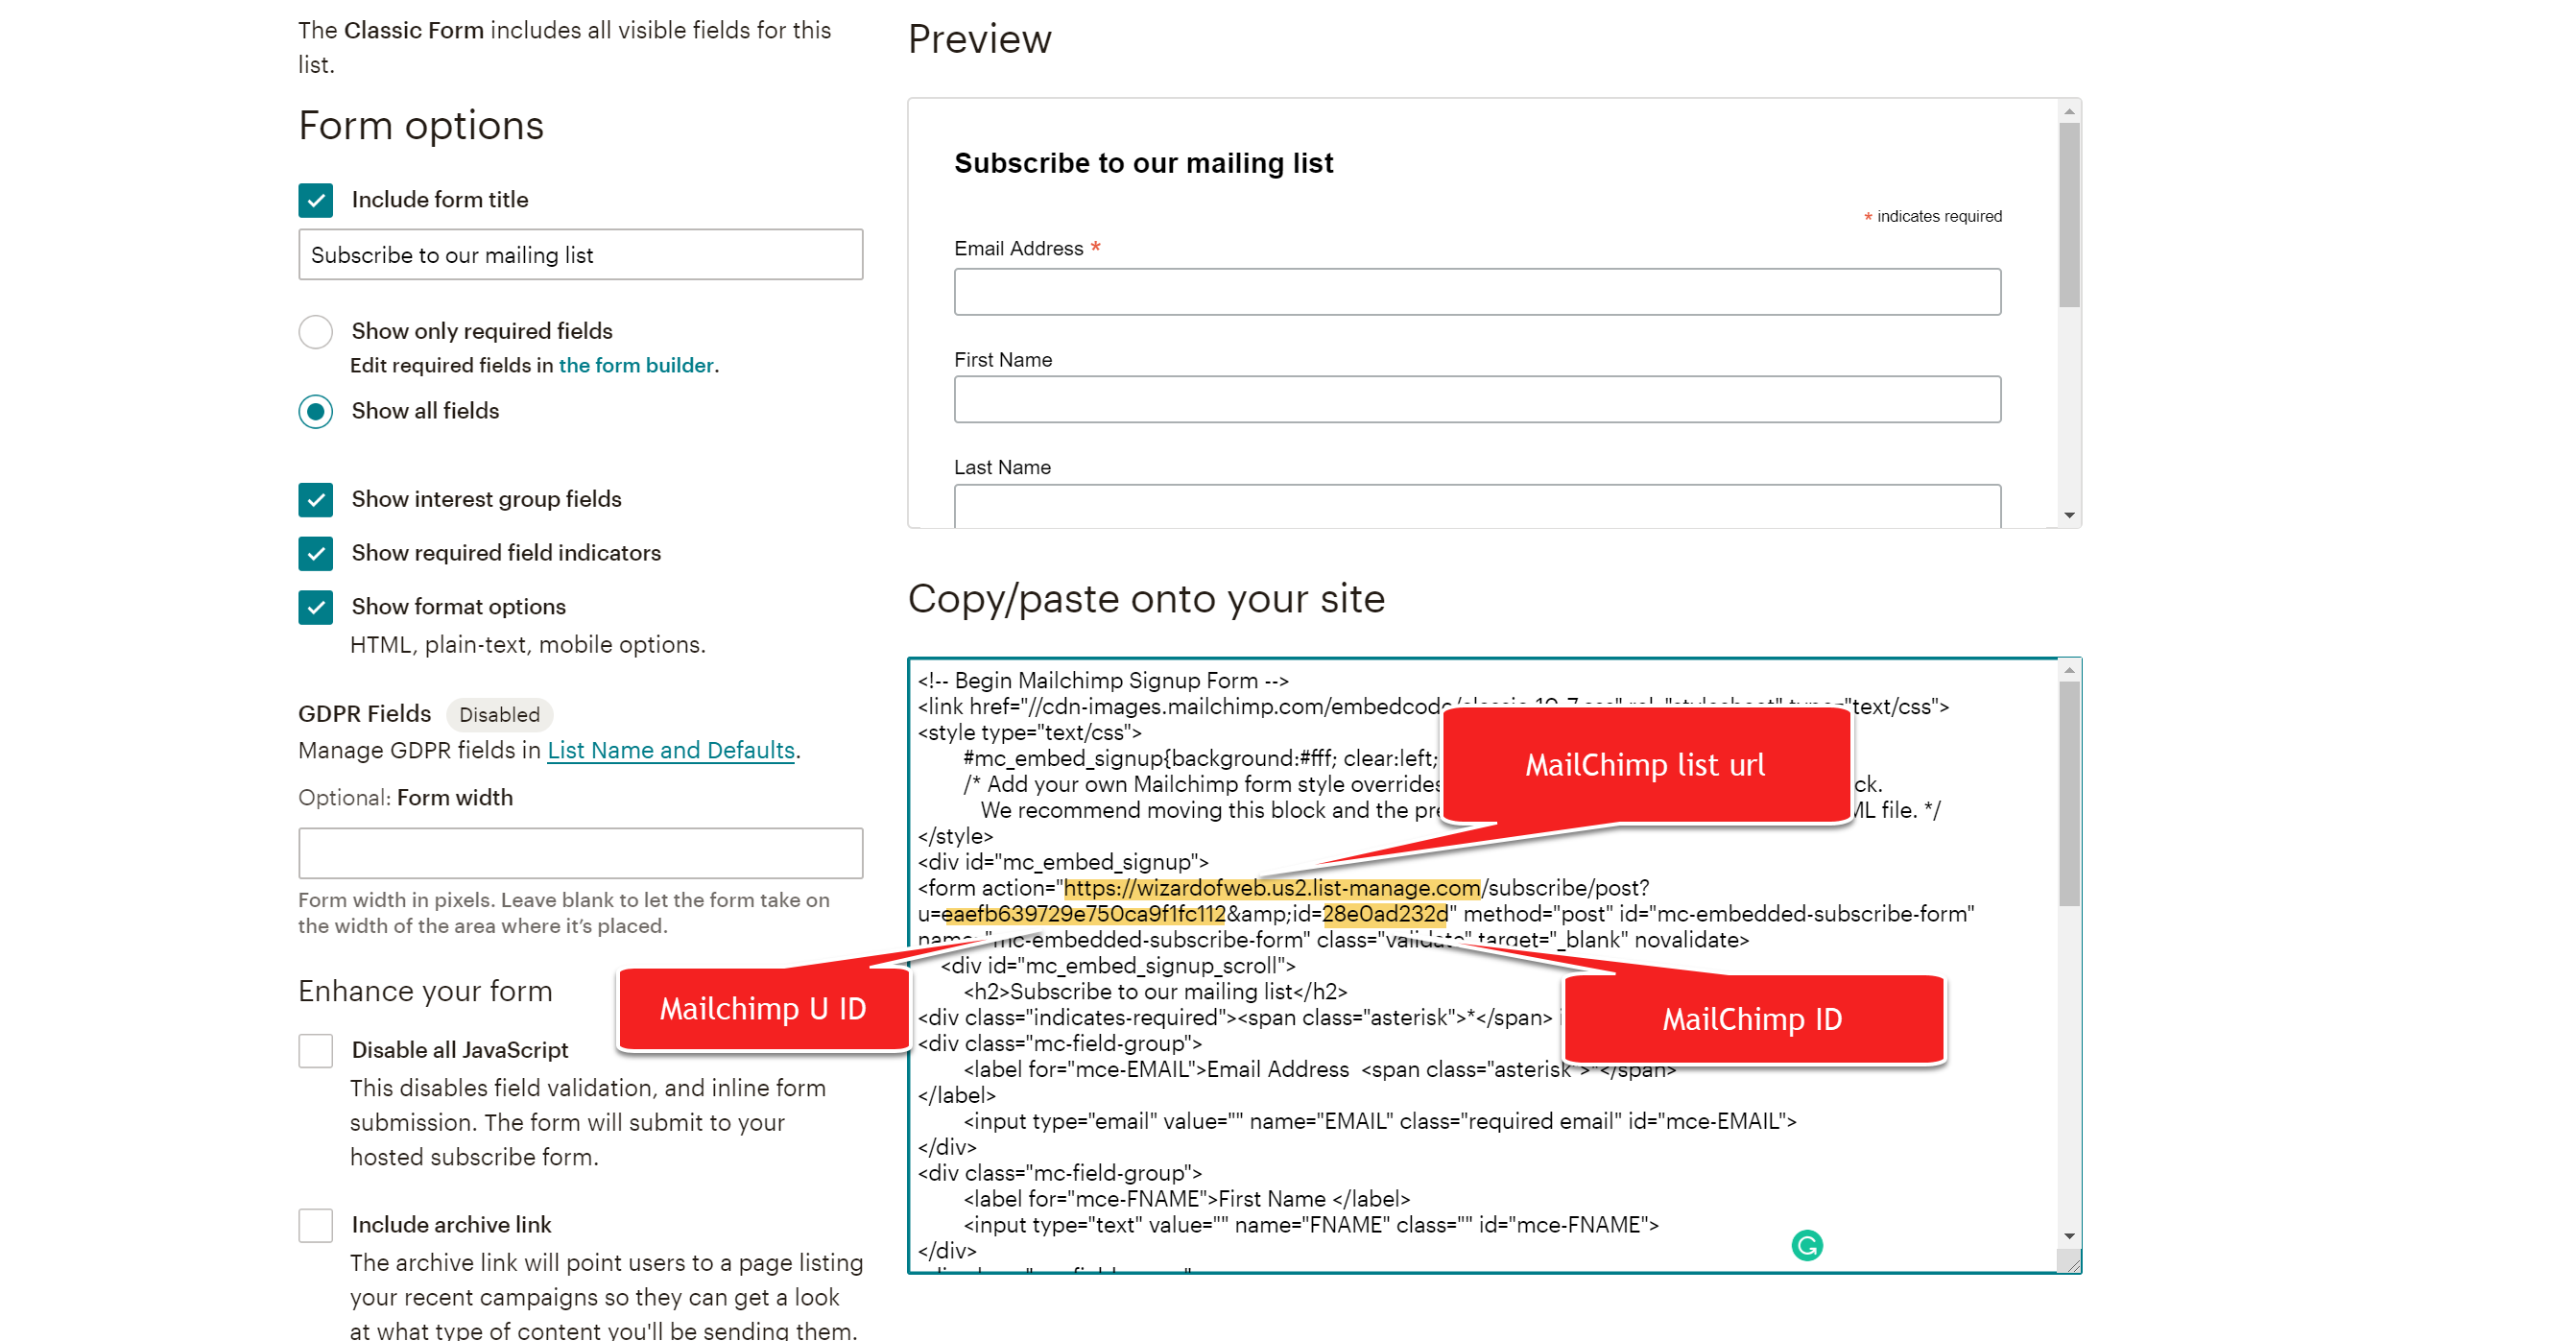
How to obtain your Klaviyo Form ID: https://help.klaviyo.com/hc/en-us/articles/115005078647-Find-a-List-ID

Newsletter Heading
 – Write your newsletter heading here. Ex: “Subscribe and SAVE!”

Newsletter Text – Write your newsletter text here. Focus on the benefits of joining. Ex: “Get daily deals and sales delivered to your inbox.”

Newsletter Success Message – Write your newsletter success message here. This will appear after clicking the newsletter button.

Enter Coupon Code – Enter the coupon code to be shown after newsletter opt-in. NOTE: You will need to set this up in your Shopify admin for customers to use.

Newsletter Button Text – Enter your CTA button text here. Ex: “Send My Deals!”, “I Want to Save”.

Did this answer your question?